
Partial Linked Component Copy in Fusion 360 (Script)
TL;DR
Copy-Paste creates a strong link between the original and copy component.
Copy-PasteNew create no link between the original and copy component.
What if you want something in between. Do a Copy-PasteNew and then change all the parameter references for the copy component to reference back to the parameters of the original component. Running the CopyReferenceParameters will do this automatically for you.
Description
A Fusion 360 script to help to quickly have one components parameters reference back to another components parameters. This is especially useful when create a Partially Linked Component, something between Copy-Paste and Copy-PasteNew.
Install
Copy the whole CopyReferenceParameters folder (https://github.com/cmactagg/Fusion360Scripts) and drop it into your API/Scripts folder. On windows this is something similar to C:\Users\<your windows user>\AppData\Roaming\Autodesk\Autodesk Fusion 360\API\Scripts
Restart Fusion 360.

How to use
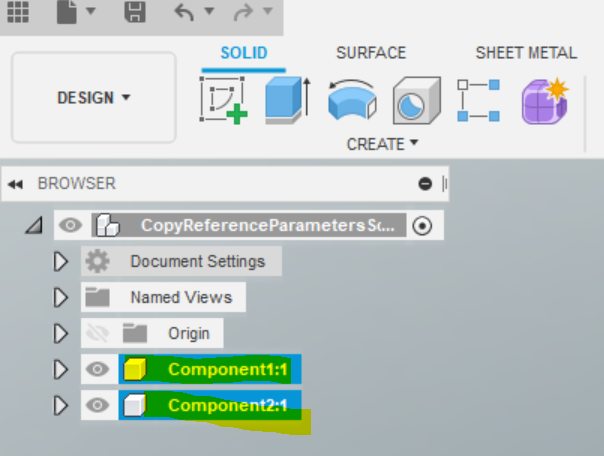
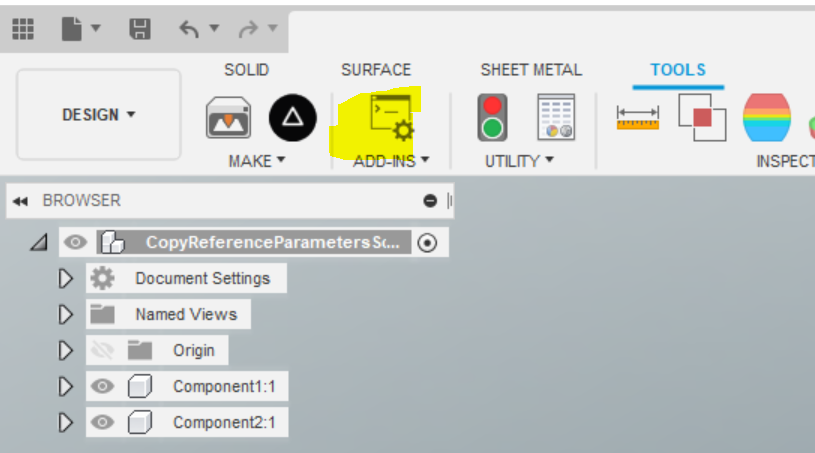
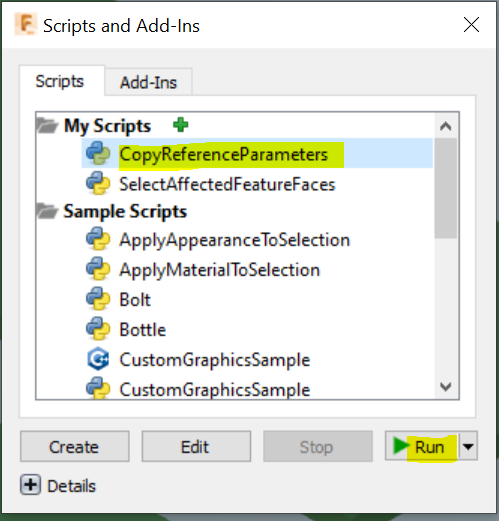
Select two components (Componet1 (original) then Component2 (copy)). Run the CopyReferenceParameters script. You can find the script in the Design workspace menu. Tools -> Add-ins -> Scrips and Add-ins -> Scripts -> My Scripts -> CopyReferenceParameters-> Run
Why use this script
Out of the box, Fusion 360 give you two ways to copy a component.
Using Copy-Paste, the second instance of the component will be directly tied back to the original instance. When ever you change anything about one of the instances, it will be reflected in the other instance.
Using Copy-PasteNew, the second instance of the component will be completely independent of the original instance. When you change anything about one of the instances it will not reflect in the other instance.
But what if you want some aspects of your copied component to be tied back to the original, and other aspect to not be.
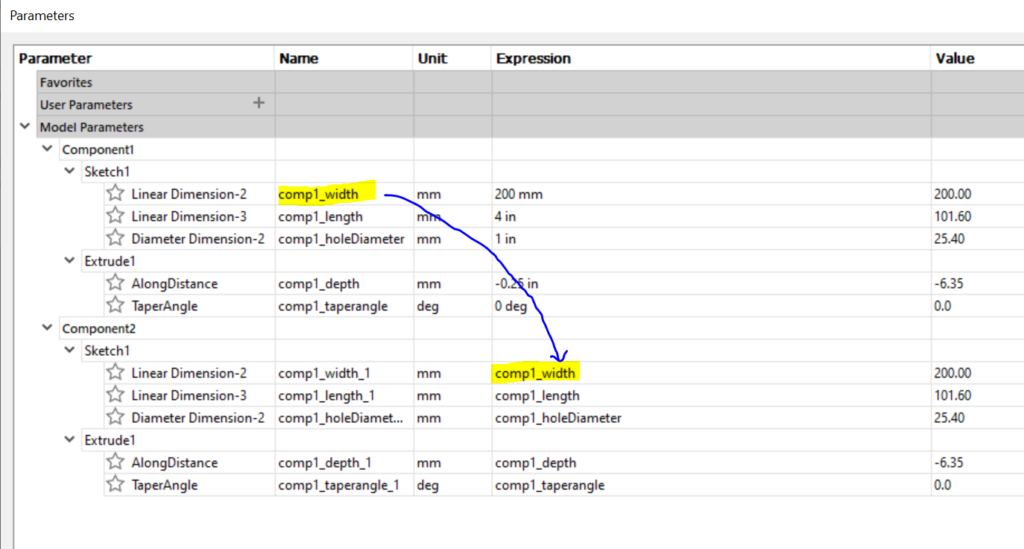
For example: if you were to model a piece of metal tubing that is 2″ wide and 4″ high and a wall thickness of 0.25″, but you need 3 of these in you assembly, all of different lengths. You want the width, height, and wall thickness to all reference back to the same dimension, but have the length be specific to each component. To do this, create your first metal tubing. Copy-PasteNew twice, so you now have 3 components that are all independent of each other. Select component1 and component2 and run the CopyReferenceParameters script. Select component1 and component3 and run the CopyReferenceParameters script. Now view the Parameters (Change Parameters) of your model. You will see that all the parameters for component2 and component3 reference the parameters of component1. If you change the parameters of component1, component2 and component3 will also change.
If you enter a new length for component2, only component2 will change as the parameter no longer references back to component1.
Proper use of User Parameters would largely negate the need for this script, but I think there are scenarios where both approaches have merit.
Example
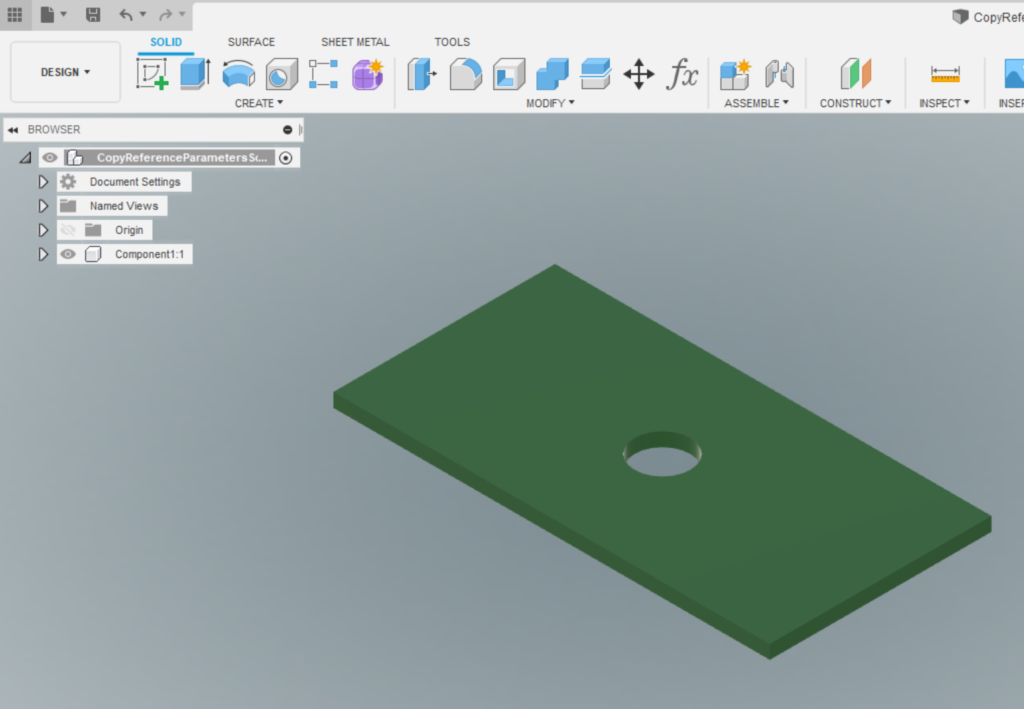
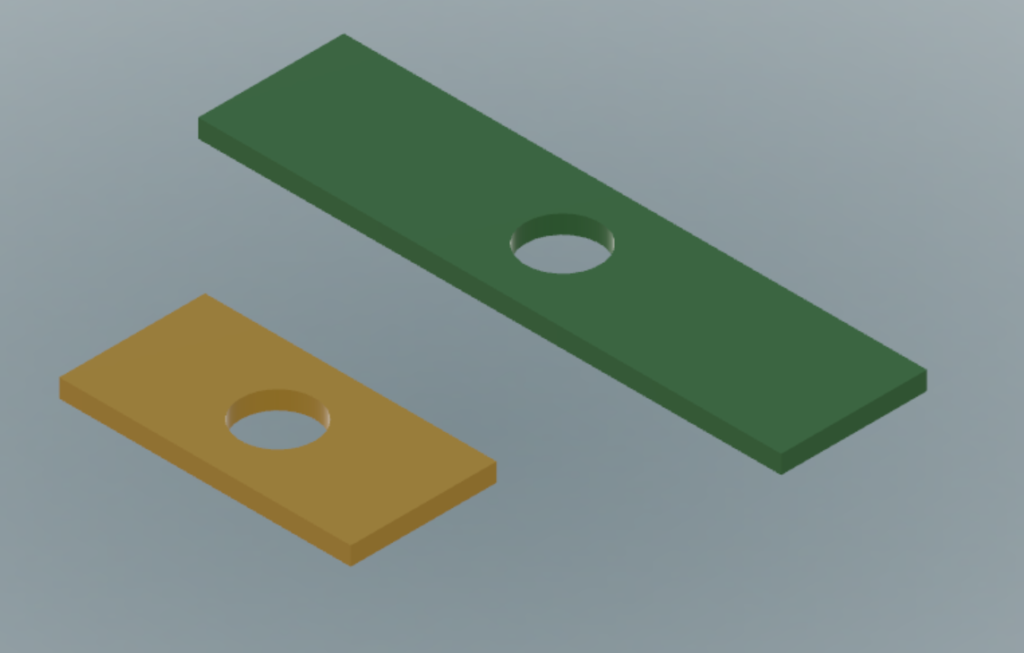
Select a component (Componet1), and Copy-PasteNew, and position Component2.
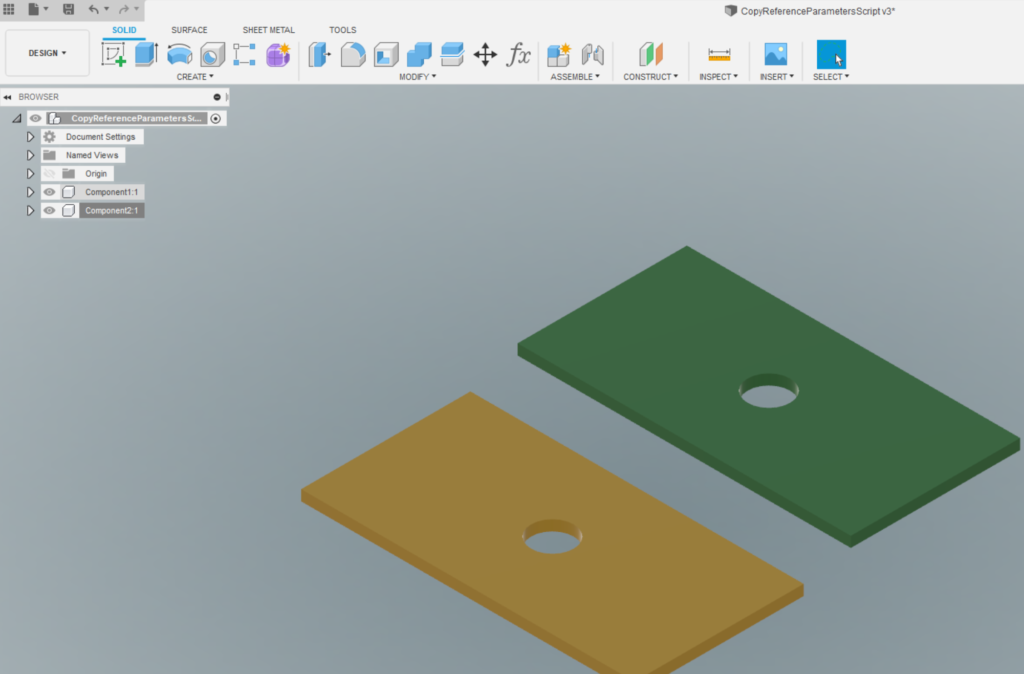
Component1 and Component2 have no references between them, so when you change Component1, Component2 is unaffected.
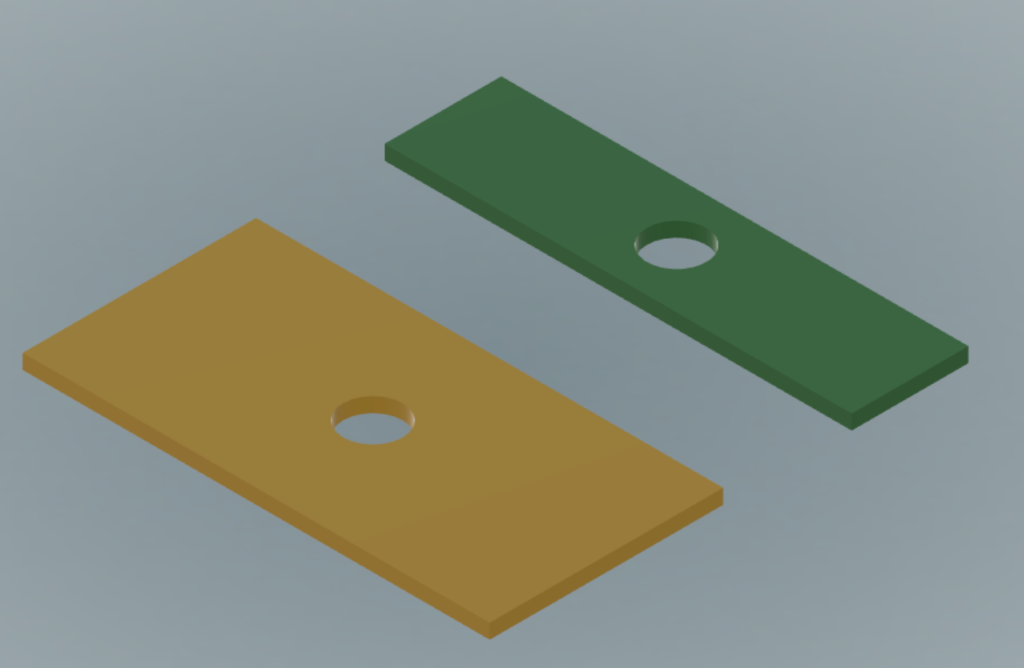
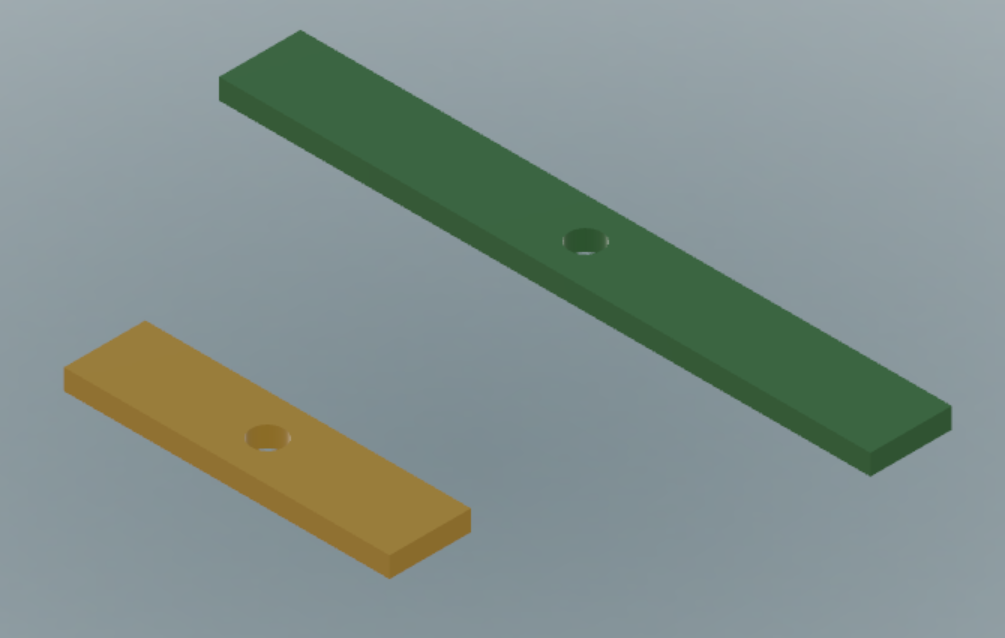
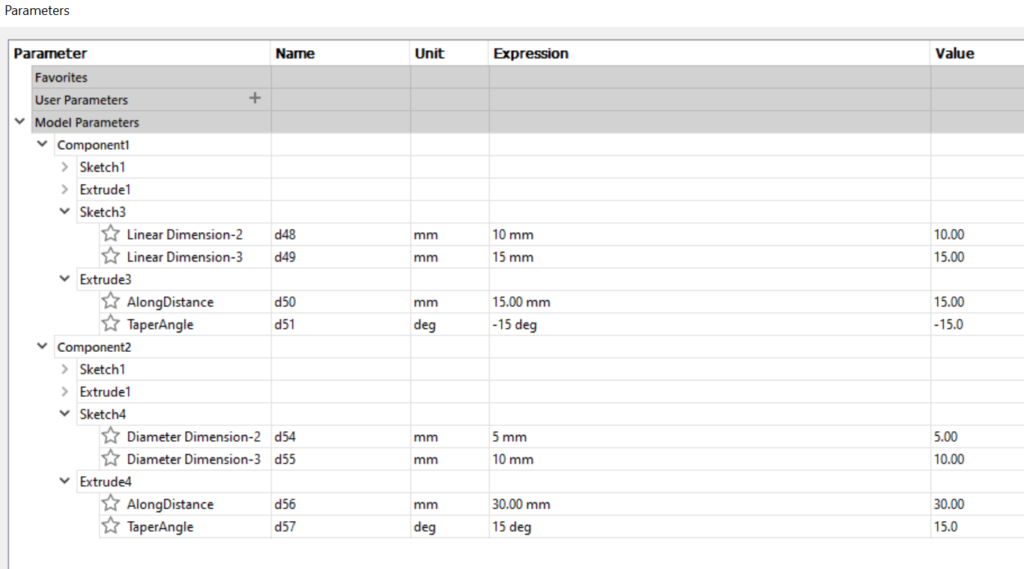
Select Componet1 and Component2 (in that order), and run the CopyReferenceParameters script. Now when you change parameters/dimensions for Component1, Component2 will also change as all the parameters/dimensions for Component2 reference back to Component1. Take a look at the model Parameters (ChangeParameters) to validate this.
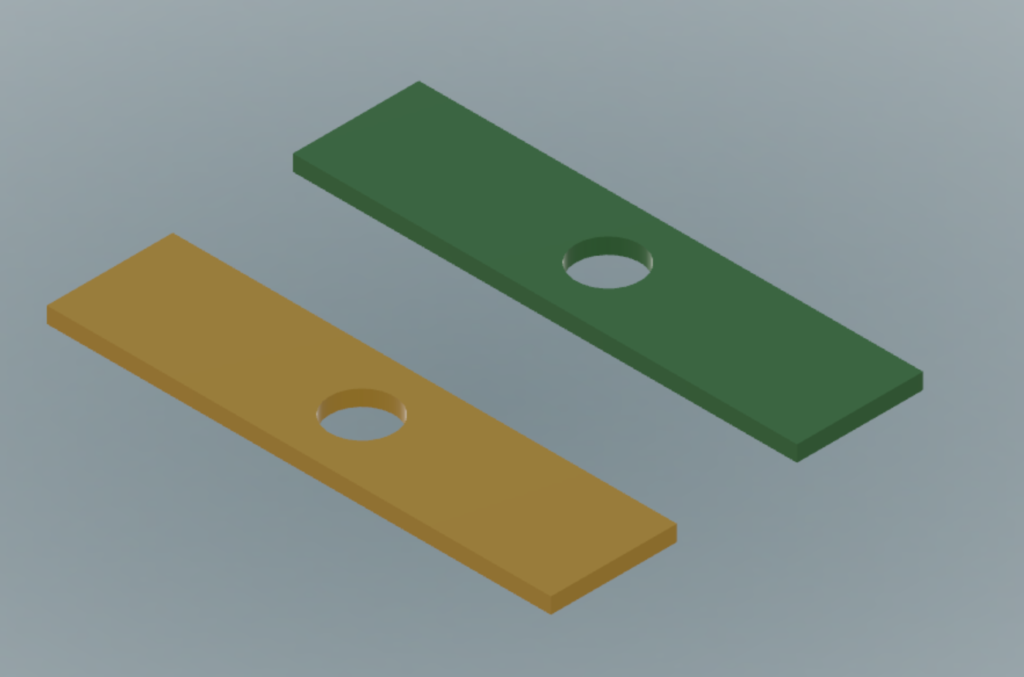
Now if you want Componet2 to be slightly different, maybe a bit longer than Component1, but everything else the same, just change the length of Component2. Now Component2 has its own length value and doesn’t reference back to Component1 length.
Now, lets do something weird and see what happens.
Lets extrude a rectangle on Component1 (this adds four new dimension parameters to the component, the width and length of the rectangle, the extrude distance and taper angle). Then extrude two circles on Component2 (this adds four new dimension parameters to the component, the diameters of circle 1 and 2, the extrude distance and taper angle)

Now run the script again.
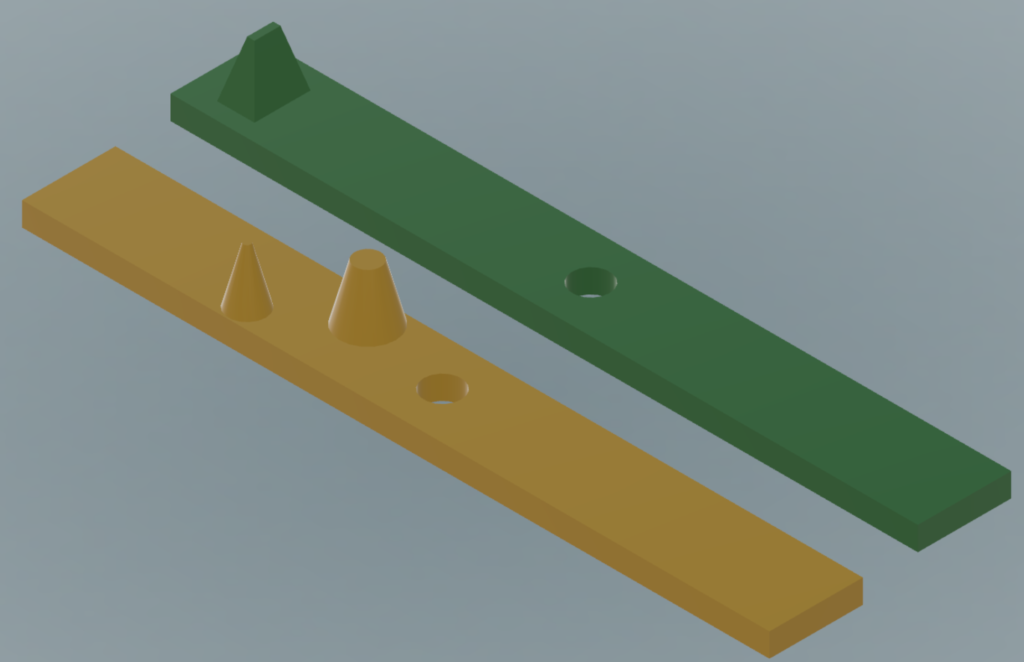
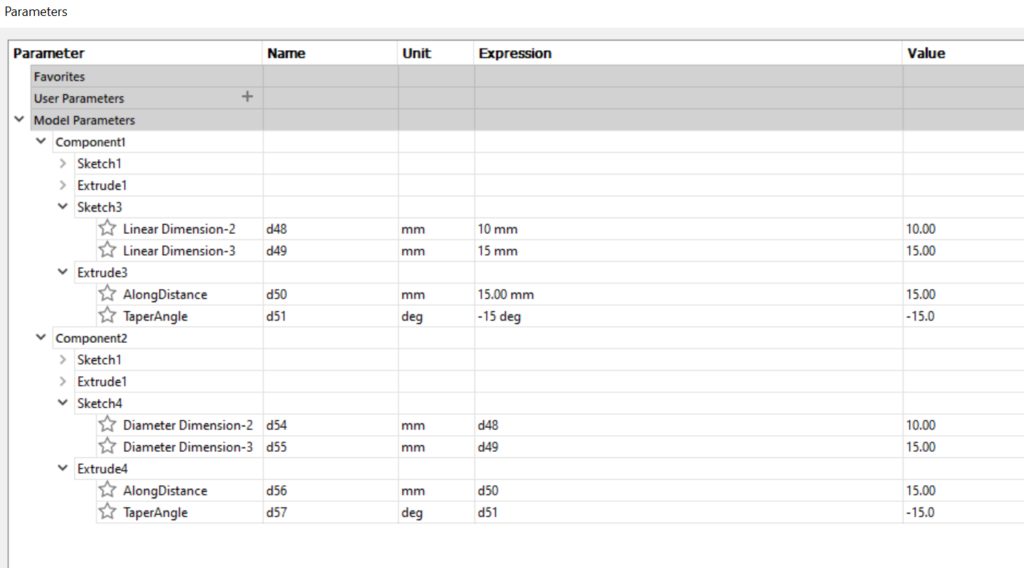
What happened?
The script doesn’t care what the parameters are used for, as long as they are of the same units (length can reference a length, angle can reference an angle).
So now, the diameter of the first circle on Component2 references the width of the rectangle on Component1.
The diameter of the second circle on Component2 references the length of the rectangle on Component1.
The extrude distance of the circles on Component2 references the extrude of the rectangle on Component1.
The taper angle of the circles on Component2 references the taper angle of the rectangle on Component1.
So, some scenarios, this script can be valuable, but others it just doesn’t make much sense.